

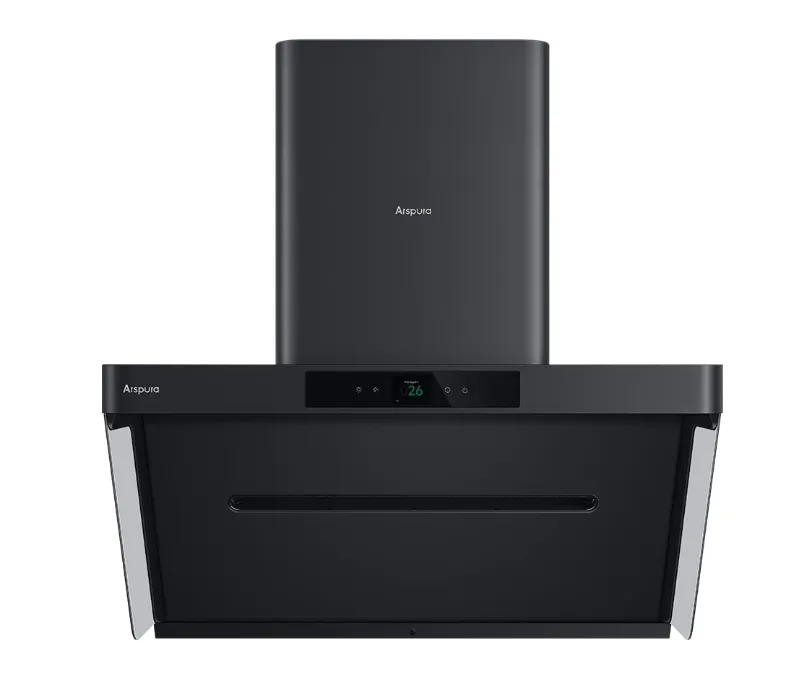
Installing a kitchen hood is one of the most effective ways to improve air quality and create a healthier cooking environment in your home. Whether you’re a professional chef working from home or a passionate home cook who prepares meals daily, proper ventilation makes a significant difference in managing smoke, grease particles, and harmful pollutants that accumulate during cooking.
Many cooks struggle with inadequate ventilation systems that fail to remove cooking byproducts effectively. Smoke lingers in the air, grease settles on surfaces, and harmful particulate matter remains suspended in your breathing space. These conditions not only create discomfort but can also pose long-term health risks, especially in kitchens where heavy cooking occurs regularly.
The solution lies in selecting and properly installing a high-performance kitchen hood equipped with adequate airflow capacity and modern air quality monitoring features like PM2.5 sensors. This guide will walk you through choosing the right hood for your needs, installing it correctly with attention to safety, and maintaining it for optimal long-term performance.
Choosing the Right Kitchen Hood
Selecting the appropriate kitchen hood begins with understanding your cooking habits and kitchen layout. For those who frequently cook with high heat, use multiple burners simultaneously, or prepare foods that generate substantial smoke and grease, airflow capacity becomes the most critical factor. The cubic feet per minute (CFM) rating determines how much air the hood can move, and professional-grade cooking typically requires a minimum of 600 CFM, while heavy-duty cooking scenarios may need 900 CFM or higher.
The size of your cooktop directly influences the hood size you need. A general rule suggests that wall-mounted hoods should extend three inches beyond each side of your cooking surface, while island hoods require even greater coverage due to cross-currents from multiple directions. Measure your cooktop width carefully and add six inches to determine the minimum hood width that will effectively capture rising cooking emissions.
Modern kitchen hoods now incorporate air quality monitoring technology, particularly PM2.5 sensors that detect fine particulate matter invisible to the naked eye. These particles, measuring 2.5 micrometers or smaller, penetrate deep into lungs and pose significant health risks with prolonged exposure. Hoods equipped with PM2.5 monitoring can automatically adjust fan speeds based on detected pollution levels, ensuring your kitchen air remains within safe parameters without constant manual adjustment. This feature proves especially valuable during extended cooking sessions when you might otherwise underestimate the accumulation of harmful particles in your breathing space. Brands like Arspura have integrated these sensors into their kitchen ventilation systems, allowing homeowners to monitor air quality in real-time while cooking.
Kitchen Hood Installation
Begin the installation process by shutting off power to your kitchen at the circuit breaker panel, not just at the light switch. Locate the breaker that controls your kitchen’s electrical circuits and flip it to the off position, then verify the power is truly disconnected by testing the outlet or existing hood with a voltage tester. If you’re replacing an existing hood, disconnect the electrical wiring and carefully remove any mounting screws or brackets holding it in place. Support the old hood from below as you remove the final fasteners to prevent it from falling, and have a helper assist you since kitchen hoods can be surprisingly heavy and awkward to maneuver.
With the old unit removed, measure the installation space carefully to confirm your new hood will fit properly. Most manufacturers provide a paper template that you can tape to the wall, marking the exact locations for mounting brackets and ductwork connections. Position this template at the recommended height above your cooktop, typically 24 to 30 inches for electric ranges and 28 to 36 inches for gas ranges, though you should always consult your specific model’s installation manual for precise requirements. Mark all screw holes and duct openings with a pencil, then use a stud finder to locate wall studs for secure mounting.
Follow the manufacturer’s installation instructions precisely, as each hood model has specific requirements for mounting and venting. Install the mounting bracket first, ensuring it’s level and securely fastened to wall studs rather than just drywall. If your hood requires ducted ventilation, connect the ductwork before lifting the hood into place, using metal duct tape to seal all joints and maintaining the shortest, straightest path possible to the exterior vent. Lift the hood onto the mounting bracket with assistance, align it properly, and secure it with all provided fasteners. Connect the electrical wiring following local building codes, matching wire colors carefully and securing all connections with wire nuts. Finally, install the filters and any decorative components before restoring power at the breaker panel.
Electrical Safety
Before touching any wiring, confirm the circuit breaker remains in the off position and use a non-contact voltage tester to verify no electricity flows to the work area. Inspect the existing wiring for any signs of damage, fraying, or discoloration that might indicate previous overheating. When connecting the new hood, match the black wire to black (hot), white to white (neutral), and green or bare copper to the ground wire. Secure each connection with appropriately sized wire nuts and wrap them with electrical tape for additional protection. If your home’s wiring appears outdated or damaged, or if you feel uncertain about any electrical aspect of the installation, hire a licensed electrician to complete this portion of the work safely.
Testing the Hood
Once installation is complete and power is restored, turn on the hood at its lowest setting and gradually increase the fan speed while listening for unusual noises or vibrations that might indicate loose components or improper installation. Hold a tissue or piece of lightweight paper near the hood’s intake area to visually confirm strong suction across the entire cooking surface. If your hood features PM2.5 monitoring, allow it to run for several minutes to establish a baseline reading of your kitchen’s air quality. Cook a test meal that generates some smoke or steam, observing how quickly the hood responds and clears the air, then adjust the fan speed settings to find the optimal balance between noise level and ventilation effectiveness for your typical cooking activities.
Maintenance Tips
Regular filter cleaning forms the foundation of effective hood maintenance. Grease filters should be removed and cleaned every two to four weeks depending on your cooking frequency, with heavy users cleaning weekly. Most metal mesh filters can go directly in the dishwasher, while baffle filters may require hand washing with hot water and degreasing dish soap. Charcoal filters in recirculating hoods need replacement every three to six months since they cannot be cleaned, and ignoring this schedule dramatically reduces odor elimination effectiveness.
Inspect the ductwork and exterior vent at least twice yearly for blockages that restrict airflow. Birds occasionally nest in exterior vents, and grease can accumulate in duct joints over time, reducing your hood’s performance even when the motor runs properly. Remove the exterior vent cover and look inside with a flashlight, clearing any visible debris. Wipe down the hood’s interior surfaces monthly to prevent grease buildup that becomes increasingly difficult to remove as it hardens and accumulates in layers.
Check the fan motor and electrical connections annually for signs of wear or loosening. Tighten any screws that have vibrated loose during operation, and listen for changes in motor sound that might indicate bearing wear. If your hood features PM2.5 monitoring, verify the sensor continues to respond appropriately by creating steam or light smoke and observing whether readings change accordingly, ensuring this critical health feature remains functional throughout the hood’s lifespan.
Creating a Healthier Cooking Environment
Installing a kitchen hood with adequate airflow capacity and PM2.5 monitoring capabilities transforms your cooking space into a healthier environment where you can prepare meals without compromising air quality. The investment in a properly sized hood, combined with correct installation that prioritizes both ventilation efficiency and electrical safety, pays dividends through improved respiratory health and a cleaner kitchen free from lingering smoke and grease deposits.
Regular maintenance ensures your hood continues performing at peak efficiency for years to come. Clean filters monthly, inspect ductwork biannually, and verify that PM2.5 sensors remain responsive to changes in air quality. These simple habits preserve the system’s effectiveness and protect your long-term health investment.
A quality kitchen hood represents more than just another appliance—it’s essential infrastructure for anyone who takes cooking seriously. Whether you’re preparing elaborate multi-course meals or simply cooking dinner for your family, breathing clean air while you work makes the entire experience more enjoyable and sustainable. Take the time to choose wisely, install carefully, and maintain diligently for a healthier cooking environment that supports your culinary passion for years ahead.